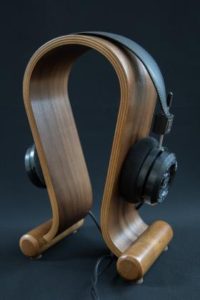
‘Still Life’ is essentially, an item that’s not moving and not alive so can be considered Still Life!
Trying to photograph your particular still life in the best possible way requires some essential skills and these are about to be shared with you now, to ensure you obtain the best quality images whether used to help market a product, record an item for insurance or simply to place the item on e-bay to sell.
Firstly, you will need to understand and learn about composition and lighting. With Composition: Allow space around the item(s) – do not cram everything into a tiny space as the image can look cluttered.
- Consider the ‘rule of thirds’ with your composition and place the item accordingly – not simply in the middle of the frame.
- Check for vertical and horizontal line angles to ensure your subject is straight in the frame! With lighting: Most of the time you’re likely to be working indoors. However, you will need good light, so work near a window, preferably one that allows plenty of sunlight in (not directly onto the subject). It’s good to work with natural light when possible.
- If you are using artificial light such as: lamps, fluorescent tubes or even candles, there will inevitably be a ‘white balance’ adjustment required. This should take care of any discolouration in the subject due to light that is anything other than daylight falling on your item.
- Capture your image as a RAW file. In this way any discolouration can much more easily be corrected in software.
– If your camera has a built-in flash, you’ll need to be careful when using it as the light could burn out any details and cast dark shadows behind the item. - If you are using the preferred window light, you will probably need to set slower exposure times. Ideally, you will use a tripod and remote shutter release.
Backgrounds: One easy mistake to make is not thinking about the background, and they are your main item of contrast. The right background will help to push the subject forward towards the viewer. The wrong background will hide the subject. Ensure the background has no creases (perhaps iron it first) as these can be distracting. - Ensure your item is clean and dust free where possible – as dust shows up on the final image.
- Select suitable aperture setting; perhaps f8 to f16 ensuring a greater depth of field within the image – more sharpness across the item.
- Ideally select an ISO setting of 100 for the highest quality.
- The shutter speed will be largely dependent on the available light (or additional lighting provided) and is not important as your camera should be on a tripod.
- Try reflectors (white paper or card can suffice) to reduce shadows.
- Although you will inevitably need to ‘enhance’ your images within software, by getting everything else right in camera at the time of taking the photo will reduce the time spent here.
- Most importantly with still life (and all forms of photography) the three key words are; practice, practice, practice!
- Once again, taking some control of the scene in front of you; lighting, composition, the subject positioning within your photo and backgrounds will further improve your personal photography. Try it and see for yourself – Enjoy!
I do offer feedback on photos so please try the ‘Photo Evaluation’ section to have your image(s) judged and receive constructive feedback 🙂